Showing posts with label NodeMcu(ESP8266) - WiFi Projects. Show all posts
How to Upload Sensor Data to Cloud - ThingSpeak
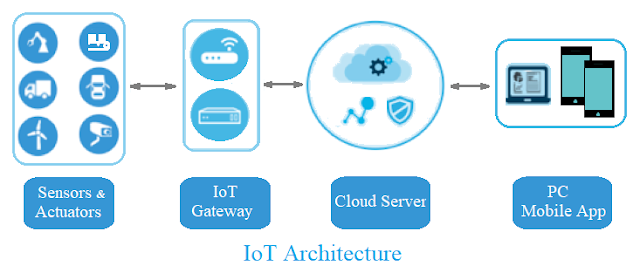
This project focuses on transforming your NodeMCU into a gateway device, facilitating the uploading of sensor data to the ThingSpeak server. This tutorial provides instructions for users to gauge ambient temperature and humidity, with the recorded values transmitted to a personal cloud server on ThingSpeak every 15 seconds. This enables users to visualize both sets of data on a web page. To accomplish data transmission to ThingSpeak using a NodeMCU, it is essential to have a NodeMCU with network connectivity. Additionally, ThingSpeak necessitates a user account and the creation of a channel, which serves as the destination for sending and storing data.
Requirements:
- NodeMcu-12E (ESP8266)
- DHT-11
- Jumper Wires
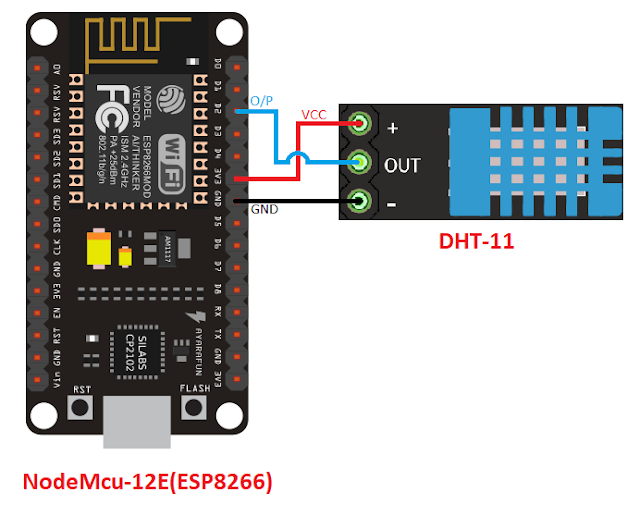
Connection Diagram:

Sign Up For ThingSpeak:
Visit https://thingspeak.com/ and create an account.
Generate a new channel, and subsequently, navigate to API keys. Copy the API key and paste it into your program.
Code:
#include
<ESP8266WiFi.h>
#include
<DHT.h>
#define
DHTPIN D2
#define
DHTTYPE DHT11
DHT
dht(DHTPIN, DHTTYPE);
const
char* ssid = " Your Wi-Fi Network name"; // replace with your Wi-Fi ssid
const
char* password = " Wi-Fi Network Password ";
const
char* host = "api.thingspeak.com";
const
char* privateKey = " Your thingSpeak API Key"; / Enter your Write API
key from ThingSpeak
void
setup() {
Serial.begin(115200);
delay(10);
//
We start by connecting to a WiFi network
Serial.println();
Serial.println();
Serial.print("Connecting
to ");
Serial.println(ssid);
WiFi.begin(ssid,
password);
while
(WiFi.status() != WL_CONNECTED) {
delay(500);
Serial.print(".");
}
Serial.println("");
Serial.println("WiFi
connected");
Serial.println("IP
address: ");
Serial.println(WiFi.localIP());
}
float
value, temp;
void
loop() {
delay(15000);
float
h = dht.readHumidity();
float
t = dht.readTemperature();
Serial.print("connecting
to ");
Serial.println(host);
//
Use WiFiClient class to create TCP connections
WiFiClient
client;
const
int httpPort = 80;
if
(!client.connect(host, httpPort)) {
Serial.println("connection
failed");
return;
}
//
We now create a URL for the request
String
url = "/update";
url
+= "?api_key=";
url
+= privateKey;
url
+= "&field1=";
url
+= t;
url
+= "&field2=";
url
+= h;
Serial.print("Requesting
URL: ");
Serial.println(url);
//
This will send the request to the server
client.print(String("GET
") + url + " HTTP/1.1\r\n" +
"Host:
" + host + "\r\n" +
"Connection:
close\r\n\r\n");
delay(10);
//
Read all the lines of the reply from server and print them to Serial
while(client.available()){
String
line = client.readStringUntil('\r');
Serial.print(line);
}
Serial.println();
Serial.println("closing
connection");
}
Output:
Output:
Open
your Thingspeak account and click on channel private view, output will be shown
as graph.

How to create Cloud - ThingSpeak account and Channels
ThingSpeak Cloud Platform
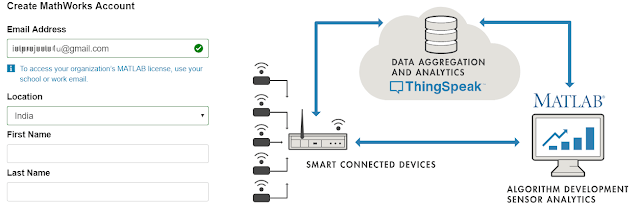
To utilize ThingSpeak for cloud computing, you have two options: either create a new MathWorks account or log in using an existing MathWorks account.
1.Sign up for ThingSpeak
Fill the Details and Click On Continue Button as show in
below fig..

You will get mail from service@mathworks.com. Open your
Email and click on verify your Email.

Click OK to login to ThingSpeak account.
2. Click Channels >> MyChannels

3. On the Channels page, click New Channel
4. Check the boxes next to Fields 1 & 2. Enter these channel setting values:

5.Click "Save Channel" at the bottom of the settings.
You now see these tabs:
Private View: This tab displays information about your channel that only you
can see.
Channel Settings: This tab shows all the channel options you set at creation.
You can edit, clear, or delete the channel from this tab.
Data Import/Export: This tab enables you to import and export channel data.
6. API Keys Settings
Write API Key: Use this key to write
data to a channel. If you feel your key has been compromised, click Generate
New Write API Key.
Read API Keys: Use this key to allow
other people to view your private channel feeds and charts. Click Generate
New Read API Key to generate an additional read key for the channel.
Note: Use this field to enter information about channel read keys. For example, add notes to keep track of users with access to your channel.

API Requests
Write API Requests is to upload sensor data to Channel.
Read API Requests is to Retrieve sensor data from Channel.
 Output
After uploading data
from the sensor using hardware modules like NodeMcu(ESP8266) Wi-Fi are
raspberry pi output will be like this.

How to Add NodeMcu (ESP8266) Board to Arduino IDE
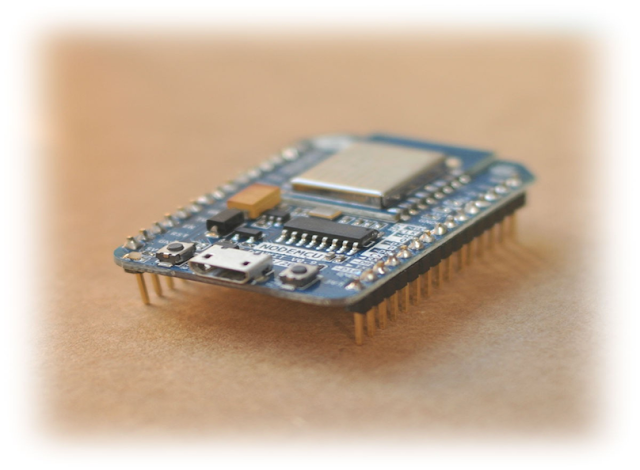
The NodeMCU board is not initially available in the Arduino IDE by default. To program your NodeMCU or ESP8266 board using the Arduino IDE, follow the steps below:
The NodeMCU ESP8266 is a low-cost WiFi module
built by Espressif Systems.

Requirements
- Arduino IDE in your PC
- Internet connection
- NodeMCU (ESP8266 ) Board
Step 1: Adding ESP8266 URL to Arduino IDE
Open your Arduino IDE. To Add additional URL for board manager.
Go to File >> Preferences

Paste below url in Additional Board Manager URLs
as Shown below fig.
http://arduino.esp8266.com/stable/package_esp8266com_index.json

Now Click OK.
Step 2: Open Board Manager
Go to Tools >> Board:
>> Board Manager

Search and Install NodeMCU(ESP8266)
in Arduino IDE as shown in below fig.
Search for ESP8266 in search
box.

Select esp8266 by ESP8266 Community.
(If internet is not available then
you will not find ESP8266)
Click on Install Button.
Download progress starts.
If your facing any errors while installation on progress try
again after few hours.
If your installation is finished Refresh or Restart your PC.
Step 3: Verify installation of ESP8266
Go to Tools>>Boards>> select NodeMCU
Board
Connect your USB cable to PC and Select
Com port.
Upload example code to check is it
working.
Subscribe to:
Posts
(
Atom
)
Internet of Things
What is Internet of Things?
What is IoT? The Internet of Things (IoT) is the network of physical objects/things are embedded with software, sensors, and hardw...